

- To begin, you will need to create an assessment in Canvas

- Ensure your rubric has been completed for the assessment.
- Students submit their work to Canvas
- Click Assignments in the navigation menu.
- Select the Assignment you want to mark.

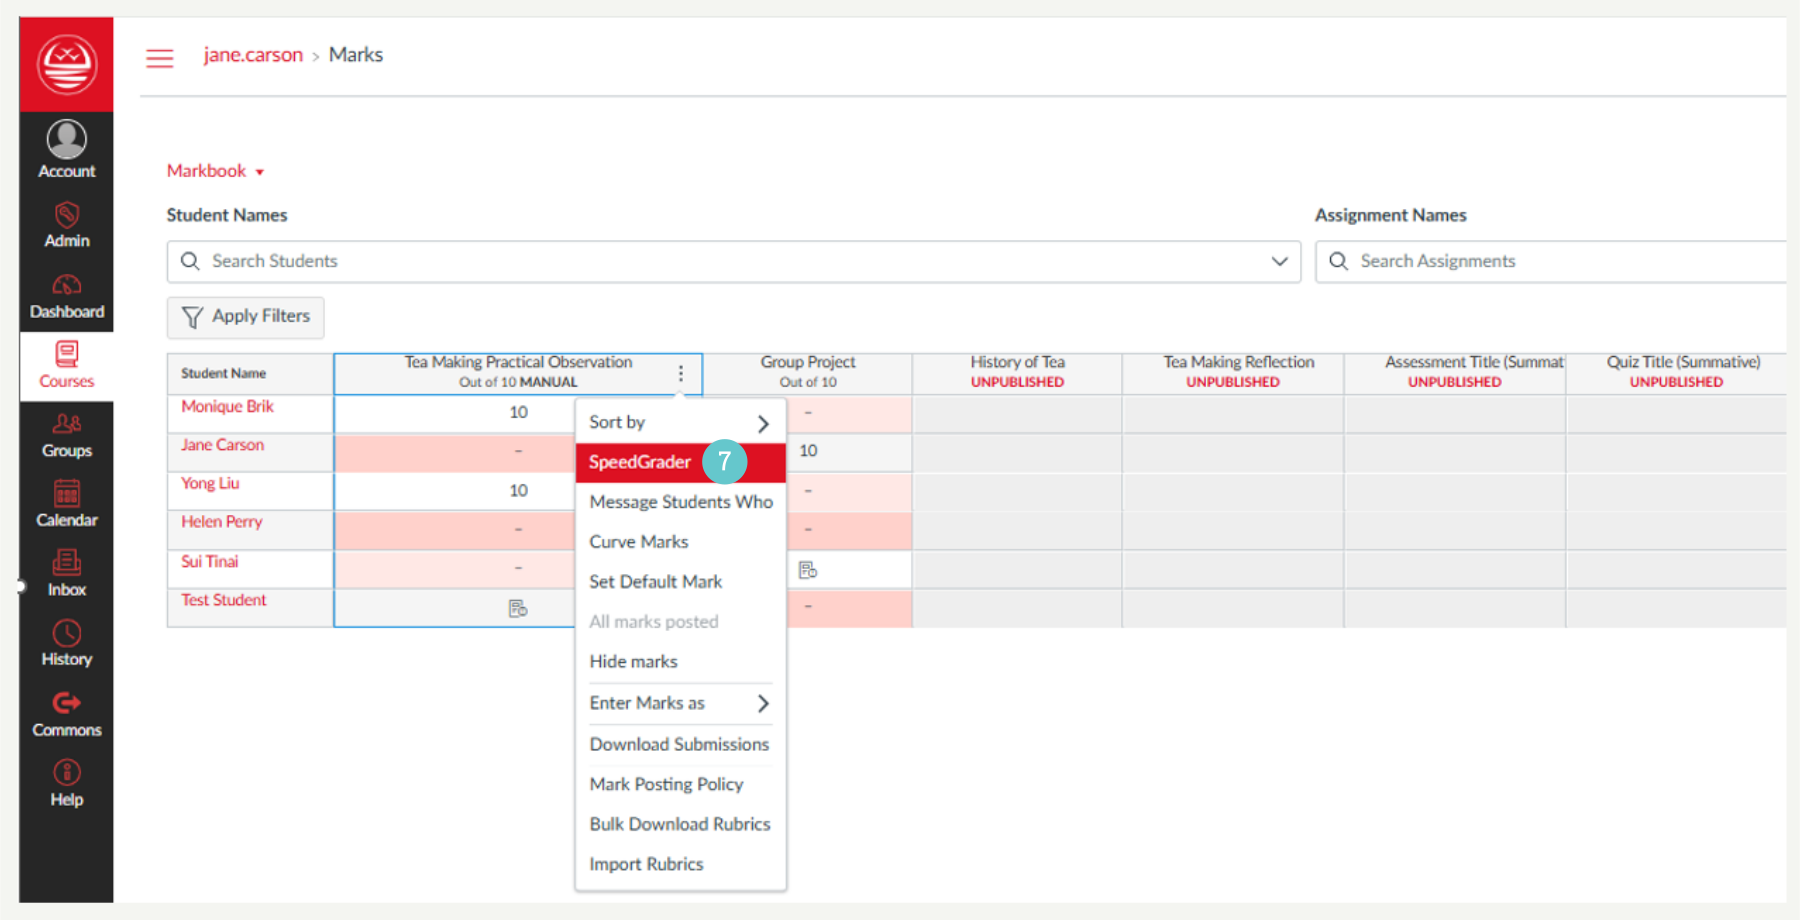
- Click on SpeedGrader in the top right

- You can also access SpeedGrader from the Marks page using the three dots on the assessment you want to mark).
- Note: It may take a moment for SpeedGrader to load
Every student in the class will have an entry – one student per ‘page’.

Your Toolbars:
- The mark book icon will link you through to the Markbook

- Click on the Eye symbol to select Hide or Post Marks to your students.


IMPORTANT:
Before you start to mark, Hide the Marks from the students. This will make sure that you can publish results when you have marked the whole class, and you are happy with your marking.

- The Settings icon gives you options to:
- Sort the Student List
- Hide Student Names (to keep marking anonymous)
- Keyboard Shortcuts
- SpeedGrader Help Menu

- Assessment Information displayed:
- Assessment Title
- Due Date and Time
- Number of Submissions
- Marking Progress
- Click the left and right arrows next to a student’s name (top right) to cycle through the students, or
- Use the red drop-down arrow to see a list of students, from which you can pick a student.
- Green Tick = assessment has been marked
- Greyed Out = the student has not submitted their assessment
- Orange Circle = assessment is yet to be marked

- The marking toolbar gives you the following options (from left to right):
- Download a copy of the document
- Scroll between pages
- Zoom
- Expand to full screen
- Make selections
- Add point comments
- Highlighting
- Add free text notes
- Add drawings
- Strikeout
- Select an area to add a note

- The student work is shown in the main section of the screen.
- If the pane is too small, click the three dots on the grey separator and drag the pane wider.
- The right-hand section displays:
- Submission details
- When the student last viewed the document
- Word Count
- How many files have been submitted
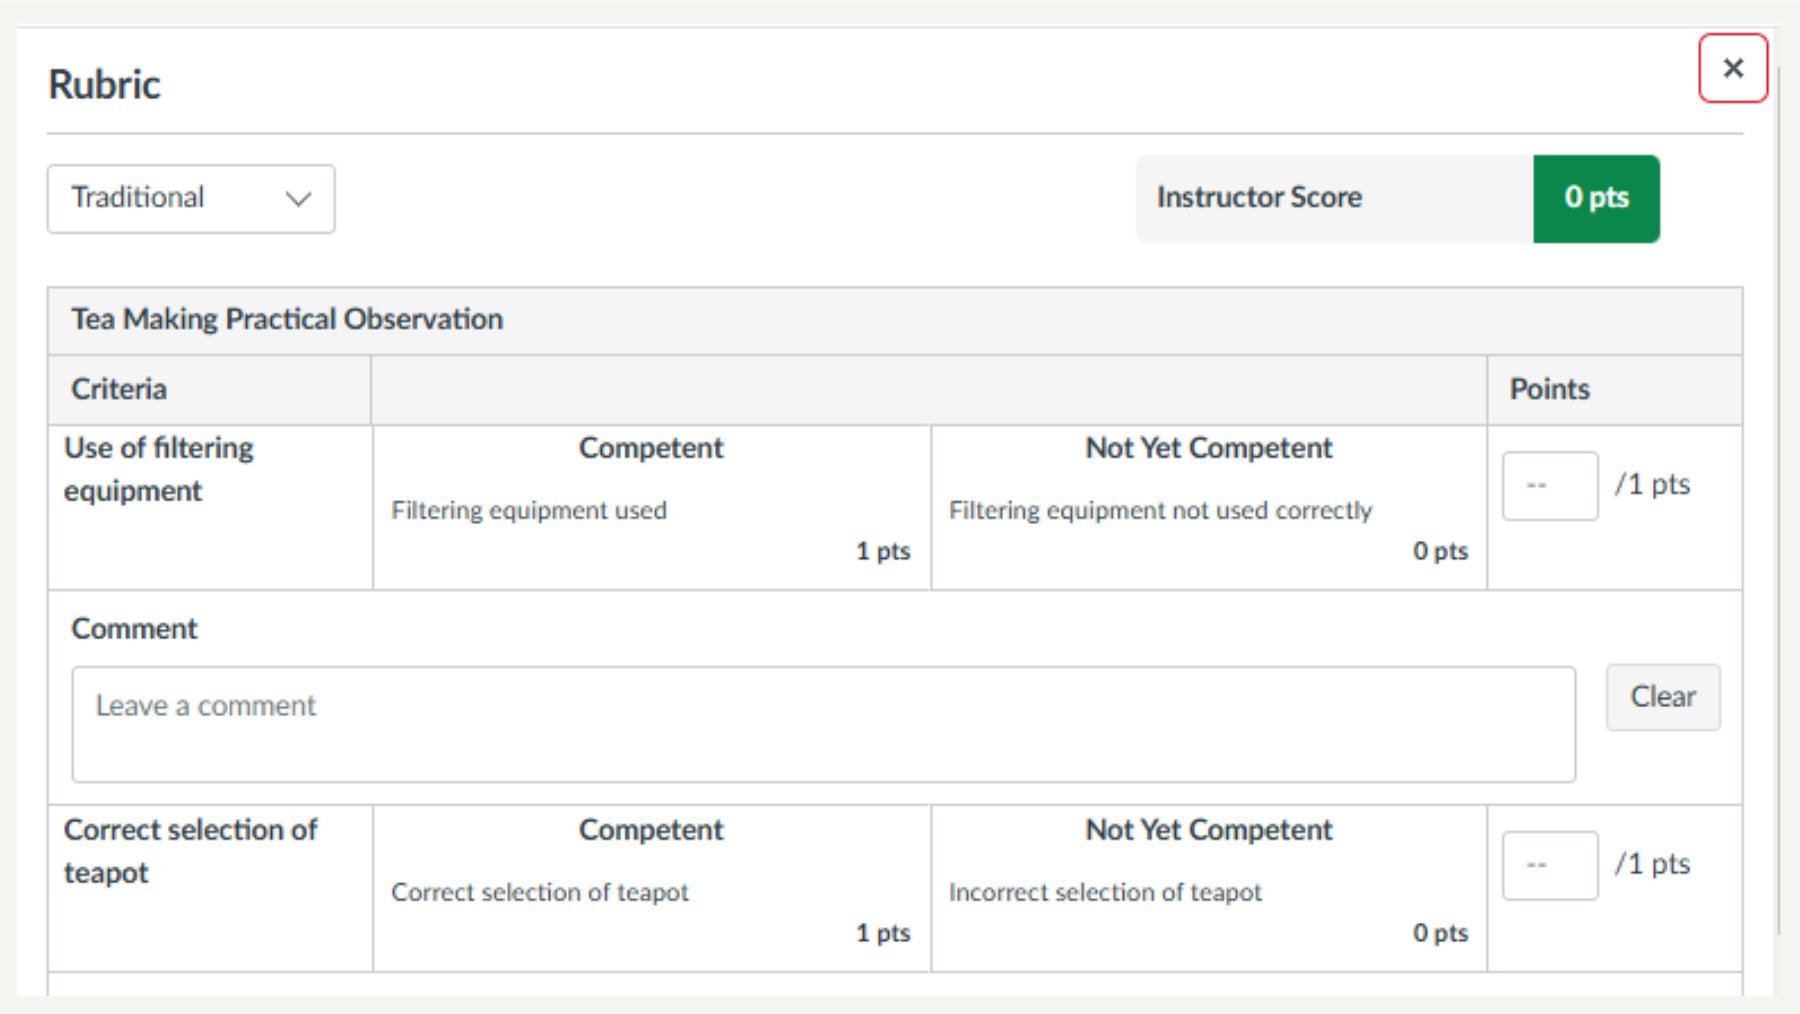
- Click View Rubric.

- You can use the drop down to view this to your personal preference:

Read the student’s answer in the main part of the screen.
- Use the right-hand section to mark student work.
- Enter the mark and any comments for each row of the rubric.

Note: If the student has not submitted any work, the main area of the screen will state, “This student does not have a submission for this assignment”

- Click Submit Assessment below the rubric area.
- If you have an overall comment to make on the assessment, enter it into the Assignment Comments box, use a comment from the comment library or, you can record or attach a comment to the student.
- Click on the speech symbol to enter verbal feedback for the student, making it far more personal for the student.
- Click on the video symbol to record videos and screen captures with auto captioning.
- Click Submit when you are happy that you have fully marked and commented on the student’s assessment.

- The bar at the top of SpeedGrader will be updated with how many students you have marked.
- Click onto the next student at the top of the page and repeat.
- Post Grades in the mark book once you have finished.
- The steps for this are available here: Post Marks to Students

Hints and Tips
- Once you’re finished marking your entire class, go back to the beginning and review each student, to ensure consistency in case your thoughts or comments may have changed through the process.
Where to go next?
3 Adding Comments in SpeedGrader
4 Adding to the Comments Library
5 Marking a Group Assignment in SpeedGrader
6 How do I get the Marks Box to Auto Populate in SpeedGrader?